Showing posts with label review. Show all posts

Wednesday, 20 March 2013

Jumping On The Bandwagon: Rimmel Apocalips Lip Laquers

Hi guys and welcome to my new blog feature 'Jumping On The Bandwagon'. Like most beauty addicts I get drawn in to the hype surrounding new products, and whilst sometimes I totally understand the popularity, sometimes I can't help feeling a little disappointed. I have decided to start posting regular 'Jumping On The Bandwagon' posts where I will review some of the most popular, hyped up products on the market and I'll let you guys know if I really think they're worth spending your hard earned cash on.


(Top-Bottom: Luna, Big Bang, Nova, Apocaliptic)

As you have probably guessed, the first hyped product I am going to be putting to the test are the massively raved about Rimmel 'Apocolips'. The Rimmel website describes them as 'The end of colour as you know it. Invincibly smooth shine. Intense earth shattering shades.' But is this the case?

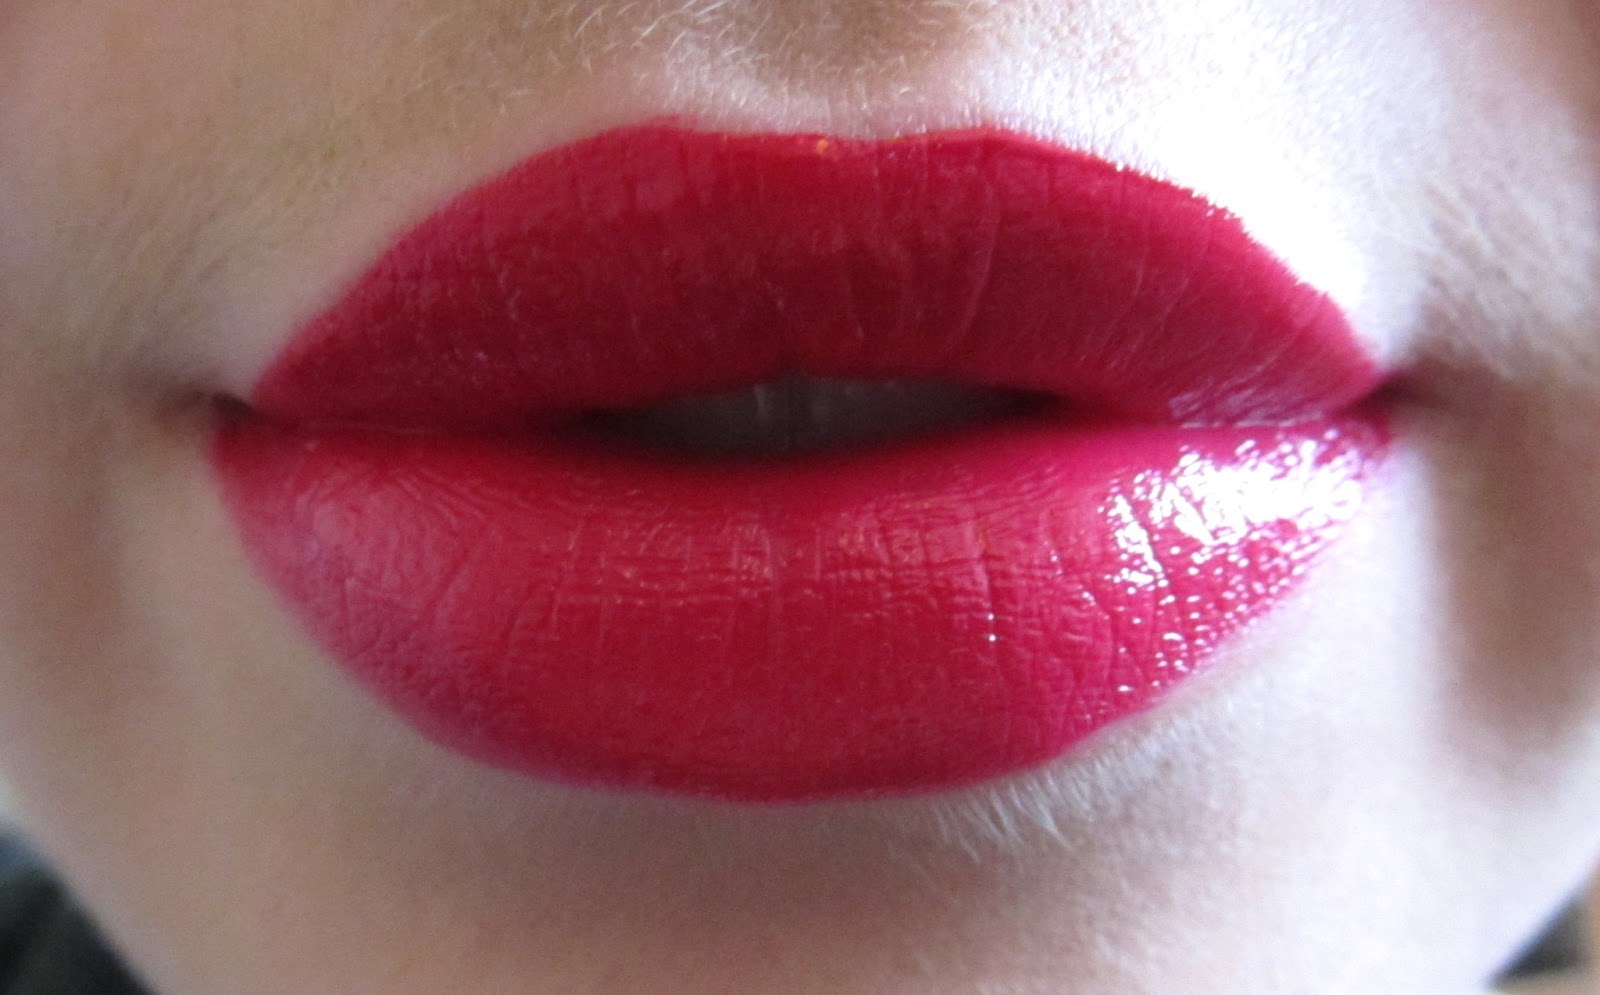
The short answer is yes. I have 4 colours in the drugstore lip laquers; 'Luna' a dusky Orange/Peach which reminds me a lot of my favourite Revlon Matte Lipstick in 'Smoked Peach', 'Big Bang' which is a bright true Hollywood Red shade, 'Nova' a bright Rose/Pink with blue undertones and 'Apocaliptic' which is a deep Raspberry/Fushcia and they are all insanely beautiful.

The texture of these lip laquers is like no other I have ever tried before. They are incredibly opaque in just one coat like a lipstick, but creamy and moisturising, more like a gloss. I honestly don't think I've ever tried anything, be that high end or drugstore, quite as impressive as these. 


(500 Luna)


(400 Big Bang)


(102 Nova)


(303 Apocaliptic)

All the swatches above are just with one layer of the lip laquers, I know incredible or what?! There are 8 shades in the collection and I am 100% going to be buying the rest of them, I have never been so excited about a new lip product. As someone with naturally dry lips these are just outstanding and have every quality I personally look for in a lip product; Opacity, longevity and a creamy, moisturising texture. And the best bit? They are currently on 3 for 2 at Superdrug, so that's 3 for just over a tenner, a bargain for such a high quality product if you ask me!

VERDICT: Worth the hype.

I hope you all like this new feature, let me know if there are any hyped products you would like me to review and I will happily do a bit of investigation, all in the name of research of course! 


Becca.x

Saturday, 16 March 2013

Review - L'oreal Caresse Lipsticks

Today I am sharing with you some of my new favourite drugstore finds; The L'oreal Caresse lipsticks. Now I know they're old news, I remember people were going crazy for them around the same time as the Revlon Lip Butters blew up but for some reason I just never fancied dipping my toe in the water. Whilst I love moisturising lipsticks, I'm also a big fan of bold colour so I thought these tints might be a little wishy washy for me. How wrong I was.


(L-R: Cheeky Magenta, Dating Coral, Tempting Lilac)

The three colours I picked up were 'Cheeky Magenta' a suprisingly intense blue toned pink, 'Dating Coral' a natural looking every day coral and 'Tempting Lilac' a really wearable pinky-lilac. The packaging of these lipsticks is chic, sleek and expensive looking and the colour payoff is buildable to that of a regular lipstick, but with a more glossy, balmy finish. Dating Coral is by far my favourite, it is subtle enough to be worn every day but really helps brighten the complexion and make you look awake on those chilly mornings.


(Top-Bottom: Tempting Lilac, Dating Coral, Cheeky Magenta)

I am super impressed with these lipsticks. The formula, packaging and colour pay off is seriously admirable and I definitely prefer these to their drugstore rivals, the Revlon Lip Butters. These are the perfect lipsticks for work, keeping your lips nicely moisturised whilst maintaining a bright pop of colour. I've definitely got my eye on a few more of these bad boys.


Becca.x

Sunday, 13 January 2013

Review - Nivea Lip Butters

I've never mentioned this on my blog before but I actually suffer with quite a severe allergy to Lanolin, an oily substance used in products to soften and moisturise the skin, so finding a good lip balm without it can prove very tricky. Popular brands such a Carmex, Blistex and Lanolips all contain it so I am constantly on the look out for something to help quench my dry lips without me resulting in over-inflated, blistered lips (mmmmmm). 

I have been hearing a lot of hype surrounding the Nivea Lip Butters but I always assumed they would contain Lanolin so never really looked into it, but when I spotted them in my local Tesco last night, low and behold they were Lanolin free and off they went, straight into my basket!


The 3 flavours I picked up were Original, Caramel Cream and Raspberry Rose and apparently there is a fourth; Vanilla & Macademia which I can tell you right now, will be mine. To start with, the packaging is simple, sleek and the perfect handbag size and personally think they look a lot more expensive than the £1.49 they cost. They smell delicious, especially the Raspberry Rose which is definitely my favourite and leave the lips feeling soft, moisturised and without that stickiness some balms can give.


The texture of the butters is not what I was expecting but is definitely a pleasant surprise. I think I was envisioning them to be a more soft cream but in actual fact they are a really high quality, thick balm with just the right amount of fragrance to be noticeable but not in any way overpowering. The flavoured ones have a tint when in the pot but this doesn't really translate on the lips which I was pleased about as I will mainly be using these at night, and as a base under lipsticks.

Overall I am so impressed with these Nivea Lip Butters, especially as someone who generally struggles with finding moisturising lip balms due to my Lanolin allergy. They cost an impressively low £1.49 and are available here online. 

Have you tried the Nivea Lip Butters? What's your favourite lip balm?


Becca.

Monday, 7 January 2013

My First Frisson With Laura Mercier

OKAY. Never before in my life have I ever, ever, ever felt this compelled to write a blog post but the Space NK sale has quite literally changed my life. I have never dipped my toe into the metophorical Laura Mercier water, but today all that has changed. I came home after what can only be described as a shitty day to find a parcel waiting for me, and that parcel contained the most stunning little box of goodies my eyes have ever seen; The Laura Mercier 'La petite patisserie quartet' in Creme de pistache.


This can't really be anything more than a first impressions post at the moment but I can honestly say I have never laid eyes on a more beautiful bath and body set in my life. The box is in a stunning simple snake print, with subtle gold writing and a beautiful red ribbon. It just screams luxury and I was literally itching to get it open.


Inside, encased in elegant red packaging, there are four generous sized minis of some of Laura Mercier's most popular bath and body products in the Creme de pistache range. There is a 90ml body wash, an equal sized souffle body cream, a cute little hand cream and a 15ml bottle of the Eau Gourmande Creme de pistache. They all seem to be extremely generous sizes and I cannot even begin to describe how absolutely insanely amazing these smell. Creme de pistache smells like the most delicious pistachio cakes in a cute little Parisian bakery (In my head anyway) and I cannot believe it has taken me this long to discover it.


Now just when this all sounded too good I feel I must touch on the price. I would in all honesty be quite happy to pay upwards of £30 for this little set, it just oozes elegance, luxury and decadence but I picked this up in the sale for a mere £12.50. Yes you heard me right, 12.50!!! I don't know how Space NK come up with their sale prices but they are literally incredible and I am seriously kicking myself now for not ordering more. I did also order part of my friends birthday present but I'll have to keep that top secret as I know she reads my blog!

So I will leave it there for tonight, I need to have some alone time with my new bessie mate Laura. If you haven't had a look already, then I urge you to go and check out the Space NK sale, there seems to be new bits added all the time and the prices are just unbelievable!


Becca.

Sunday, 6 January 2013

Review - Benefit 'She's So Jetset' Makeup Palette

For Christmas this year I was lucky enough to receive one of the Benefit makeup kits they bring out every year around the festive season. Benefit aren't a brand I have a lot of products from, I've tried a few of their items in the past and always ended up feeling they were a bit style over substance but since hearing such amazing things about the infamous 'They're Real' Mascara, I was ecstatic to receive this little box of treats under my Christmas tree.


One thing I cannot fault Benefit on is their packaging; They have such a retro 50's vibe to all their products and is just so very iconic to Benefit as a brand. The 'She's So Jetset' kit comes in a gorgeous little box complete with a mirror in the lid and contains all the bits you'd need to create an everyday subtle smoky eye look.


The gorgeous little set contains:

The POREfessional Face Primer
'Champagne Please' Eyeshadow
'Gold Card' Eyeshadow
'Pretty In Mink' Eyeshadow
'Elegant Espresso' Eyeshadow
'First Class' Face Powder & Brush
'Life on the A-List' Lipgloss
'They're Real!' Mascara

I actually really like everything included in the kit, there's nothing I won't use up but by far the stand out stars for me are definitely the face primer, which creates a silky soft base for your foundation, and the mascara which fans out and separates lashes for a full look. The eye shadows are buttery soft and very rich in pigmentation; They create the perfect soft smoky eye for day to day wear and have just the right amount of shimmer for a subtle glow.

I don't think I'll get as much use out of the face powder as I found it didn't have much colour pay off and I have other blushers I prefer but it is nice to have it in a little kit for if I'm travelling anywhere and don't want to take loads of other products with me. Similarly the lipgloss isn't really very 'me'. It is a very pretty pale pink with pearly shimmer and whilst it isn't ideal for my naturally pigmented lips, I could see it looking beautiful on someone who suits a good nude!


This is the makeup look I created using everything included in the Benefit Palette, please ignore my bedraggled looking hair, it is wet from getting out the shower. Overall I would highly recommend it if you are looking for a compact little kit that will provide you with all the basics for a really simple, natural and girly look. Even better, now it's past Christmas you can pick this little beauty up a lot cheaper! If you are interested, take a look here.

I hope you are all having a nice weekend and have enjoyed the first week of 2013! I am really loving eating healthier and I feel so much better for it already. I have been making loads of fresh fruit juices and smoothies in my liquidiser so I've been finding eating more fruit and veg really easy and enjoyable. How are your new years resolutions going?


Becca.


Sunday, 11 November 2012

DIY Ombre/Dip Dye Hair - Colour B4 & L'oreal Wild Ombre Reviews

So as you know from my last OOTD post, I have been really struggling to decide what to do with my hair; It is pretty long now and I feel like it is just lifeless, one dimensional and boring. I have had it dip dyed twice before and really liked it both times but boredom lead me to change it, I have decided to give the whole ombre hair trend one last go though and thought I'd test out the new L'oreal Preference Wild Ombre DIY kit.

Since my previous dip dye I have used various coppery/red/warm brown tones on my hair and because of this I knew it would be extremely difficult to lift the ends of my hair to any other colour than orange. Because of this I decided it would be wise to try and strip the colour out of my hair using Colour B4, an at home colour build up removal kit available from Boots, Superdrug and various supermarkets.


My hair prior to using Colour B4 - As you can see it has a lot of warmth.

I won't go into too much detail about how to actually use Colour B4 as the instructions are all included with the kit and it is extremely important you follow them to a tee, but essentially there are 3 main stages. To begin with you mix bottles A and B together and apply it liberally all over, ensuring you really work it in to the hair, especially the darker sections you require the most lift. What this does is shrink the colour molecules so you are able to wash them out in the rinsing stage. If you have thick or long hair you may want to use 2 kits as I did.

For the extra strength Colour B4 kit you leave it on for 60 minutes, and I will warn you, this stuff absolutely REEKS. Think rotten egg. I'd love to say throw open the windows, but you can't. You need warmth to ensure the best possible results so any drafts are a no-no. I stuck a Tesco plastic bag on my head for extra warmth; Cling film would have the same affect. That's right, encase that stink!

After the 60 minutes are up you go on to stage 2, the rinsing. You have to rinse with warm water for 10 minutes none stop, this feels like a suprisingly long time and I felt seriously dizzy when I lifted my head back up. An easier option they recommend is to just get in the shower, but frankly I didn't want that stinky poo smell all over my body. When the 10 minutes are up you go on to stage 3, buffing. You add half of bottle C to your hair, lather it up, leave to soak in for a minute then rinse for another 5 minutes. Finally you add the other half the bottle and use as you would a regular shampoo. You are then ready to check the results.


My hair after using Colour B4 Extra Strength.

I was really impressed with the results of the Colour B4. I think some people go into it naively expecting to go back to your natural hair colour, but the truth of the matter is you have essentially stained and altered your natural hair colour so the only way to get that back would be to grow it out. The colour I was left with was a very light, coppery brown. In order to get it to the base colour I wanted I applied John Frieda Foam Colour in 'Cool Dark Pearl Blonde'. Although I wanted a light brown result, the Colour B4 leaves your hair very porous and susceptible to colour so it is best to choose a colour a few shades lighter than you are wanting. I also only left it on for 10 minutes instead of the full time as I didn't want it too dark and it is always important to remember cool/ashy colours will neutralize warm/coppery tones in your hair and vice versa.


John Frieda Foam Colour in 'Cool Dark Pearl Blonde'


My hair after using John Frieda Foam Colour in 'Cool Dark Pearl Blonde'

As you can see from the photo above my hair was now more of a standard light/medium brown with A LOT less warmth and reddyness than I originally had in my hair. The next step is to use the L'oreal Preference Wild Ombre kit to get the desired dip dye.


My hair developing - Excuse the mucky towel!

The kit really couldn't be simpler to use. You mix it up as per the instructions, put some on the little brush you are provided with and comb it through your hair to the desired height. I'd recommend starting around chin length if you have medium/long hair, and higher up around ear height if you have short/medium hair. I applied it to the lower part of my hair for the first 10 minutes, then took it higher up towards my chin and left it for a further 35 minutes.

I washed it off and conditioned with my new John Frieda 'Full Repair' hair products (which smell INCREDS) and then slapped on a load of Lee Stafford Argan Oil to try and add some extra moisture. I then dried and styled as usual.


So here's the moment you've all been waiting for...THE BIG REVEAL!


Oh hey double chin!


So there we have it! I'm actually really pleased with the results, it has blended really nicely and I think I actually prefer it to when I got it professionally done at the hairdressers. I found that last time my hair was SO dark and the ends were SO light that it was just a bit too harsh but I think this has a really nice gradient. The one thing I would say is that my hair is feeling really dry, but I expected that. You can't expect to put your hair under that much strain with stripping and bleaching and not have your hair suffer. I am hoping a lot of conditioning masks and treatments will give my hair the nourishment it needs but overall I cannot say how impressed I am with Colour B4 and L'oreal Wild Ombre. Definite stars on the DIY hair highstreet!

I hope this helped some of you if you were thinking about going down the DIY ombre route, feel free to ask me any questions in the comments section and I will do my best to help.


Becca.x